 |
NapalmEditMapeditor for NapalmBomber3D2003 by Sascha Willems (webmaster@delphigl.de - www.delphigl.de) |
||||||||||
Content# Introduction# The editor # The toolbar # The texturemanager # The 3D-View # Custom 3D-Objects # Custom textures # Publishing your maps # Credits |
|||||||||||
IntroductionWelcome to the helpfile for NapalmEdit, the mapeditor for NapalmBomber3D.With this handy tool you'll be able to create new maps within a few minutes and use it immediately in your game.If you have made a map by yourself and like to see it published on the web, please look at the end of this document to get more infos on it. This helpfile will teach you all the basics of this editor and how to create maps.If you still have any questions, don't bother sending me an E-Mail (address see document header). |
|||||||||||
The editorAfter starting the editor your screen will look similar to the screenshot (except the fact that I already had a map open on it) :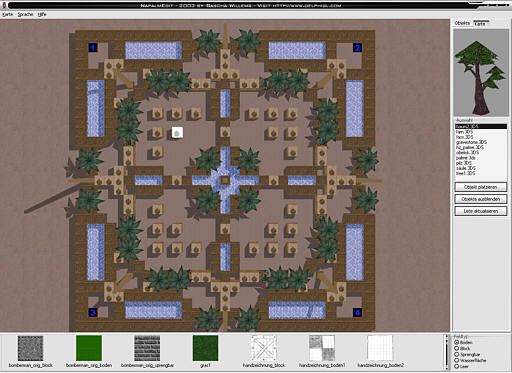 And at the top of the window you'll spot the main menu where you can start a new map, save and open it and change the language of the editor. |
|||||||||||
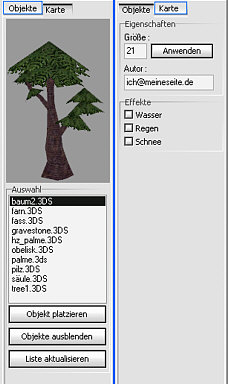
The toolbar
|
|||||||||||
The texturemanager Here you can choose the texture and the fieldtype you want to apply if you leftclick in the 3D-View.The following fieldtypes can be choosen :  from left to right : Floor : Fills the floor with the selected texture, can be crossed by the player. Block : Sets a non-destructable block that can't be damaged. Explodable : A block that can be destroyed by an explosion.It'll then be replaced by a floor-tile with the background texture. Waterplane : A plane with a watertexture that moves periodically up and down and can't be crossed by the player. Empty : (not visible on the screenshot) Let's the background texture shine through. If you have selected a texture, you can open it's context menu by rightclickin : 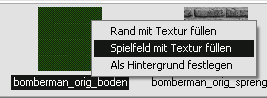 Fill border with texture :Fills the map's border with the selected texture and fieldtype.
Fill playground with texture :Fills the playground (except the border) with the selected texture and fieldtype. Set as background :Sets the selected texture as the map's background. |
|||||||||||
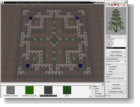
The 3D-View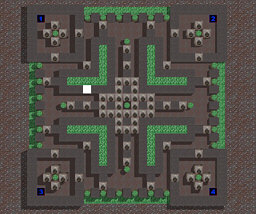
This is the part of the editor where you'll spend most time at creating your map.The field under your mouse cursor will be painted white and will be set according to your selections in the texturemanager (fieldtype and texture) when youleftclic.By holding down the left mousbutton you can quickly change many fields of your map. By holding down the right mousebutton you can scroll your map with the movement of your mouse, and a doubleclick opens the map's contextmenu where you can set the players' startpositions.Zooming the map in and out can be done using your mousewheel. The following keys are changing your 3D-View :
|
|||||||||||
Custom 3D-ObjectsBesides the 3D-Objects already contained in the download of NapalmBomber3D, you can also use your own 3D-Objects.They need to be in the 3DS format (3DStudio, e.g. exported by 3DStudio MAX), and size-wise you can take one of the contained objects to check if your's fits.Your 3DS-Files then need to be put in the subdirectory called \3DS\Objekte so that they can be used in the editor and the game.If your selfmade object also uses custom textures, then you'll have to put those in the subdirectory \textures\objekte. Important note for using 3DS-objects for the game : Filenames : The 3DS fileformat only supports the old DOS 8.3-Format for filenames, so don't use any filenames for your textures that are longer than 8 chars. Number of polygons : Like in every realtime 3D-game, it's speed also depends on the number of polygons that need to be drawn.So therefore please pay attention to the number of polys your selfmade objects consist of, and don't forget that they mostly won't be very big on the screen and moreover that you can simulate details with textures to reduce the polycount. Object's textures : Please don't use any textures bigger than 256x256 Pixels (16/24/32Bit), as bigger textures won't bring anything in terms of detail and only would cause problems (or even crash) on users with older graphicscards. |
|||||||||||
Custom texturesNot only can you make own 3D-Objects for the game, but also you can use your own texturemaps for the map itself (floor, background, blocks).The textures need to be in the JPG format (32Bit) and need to be put in the subdirectory called \textures.Important note on custom textures : As mentioned for the object's textures, custom leveltextrues should also be smaller or equal than 256x256 pixels to also let users with older graphicsboards use that map.But in most cases a size of 128x128 Pixels will be suffice. |
|||||||||||
Publishing your mapsIf you've gotten comfortable with the editor and have made some maps, and like to see them published on the net (so that other NapalmBomber3D-players can also enjoy them), you can send them to me via e-mail and I'll offer them for download in the game's section (including your name and e-mail if you like).But before you send me your map via e-mail, please read this : Send me your maps as zip-compressed files, and if you use custom textures or 3D-objects, please also include all necessary files in this zip!As soon as I uploaded your map to the NapalmBomber3D section, I'll let you know. |
|||||||||||
CreditsNapalmBomber3D/NapalmEdit programmed and designed by Sascha Willems.3D-Models and maps also created by Sascha Willems .Additional credits : The FMOD-Team for their sound-library Mike Lischke for his 3DS-Loader, from which NB3D uses some parts Borland, responsible for the world's best IDE named Delphi Finalspace for some ideas according the new editor |
|||||||||||
|
Copyright 2003 by Sascha Willems |
|||||||||||